
There is always a first time for everything. First time following an intense work schedule, first time doing my own braids, and first time trying gel nail extensions at home.
I made some silly mistakes while doing my first gel nails, as no one was there to guide me. But you do not need to worry. You have me!
I am here to guide you and answer all your queries on gel extensions so that you do not have to face any of those “first-time” issues. By following the 6 super-easy and super-effective steps, you can make the perfect gel nails.
Rest assured with the process and get started with the steps below!
Table of Contents
What Is Gel Nail Extension?
Before we jump right into the process, let me briefly explain what gel nail extensions are. If you already know, you can skip and jump directly into the process. But if you are completely new to the term, let’s have a look.
In simple words, gel extensions are thicker polygels that are cured under UV light to harden. It is an extra layer on your natural nails that provides strength and length to them. This is the classic gel nail process. However, some modern manicurists also use softer gel tips.
These readymade tips come in different shapes, lengths, and styles. But classic gel extensions are more long-lasting and great for changing nail design requirements.
In this guide, I have shared how you can create your own classic gel nail extensions at home.
Difference Between Gel Nails and Acrylic Nails
Are gel nails and acrylic nails similar? Many people have this confusion. The answer is NO. They are not similar.
So, what sets them apart? Here are gel extensions vs acrylic:
| Factors | Gel nails | Acrylic Nails |
| Materials | It uses polygel, which is made from liquid resin. | It uses a mixture of powder polymer and liquid monomer. |
| Application | It follows different steps, such as base coat, colour, and top coat. Each layer required curing under UV light. | The monomer and powder are combined to create a paste and applied to the nails. Requires an after-drying process like sculpting and shaping. |
| Curing | Cured under an LED lamp or UV light. Takes 1 to 2 minutes. | Cured through natural air and takes 20 to 30 minutes to dry. |
| Durability | Lasts a maximum of 3 weeks with good aftercare. | Latest longer than gel extensions with proper care and fill. |
| Appearance | Thinner layer with a more natural-looking appearance. | Thicker, harder, and appears somewhat artificial. |
| Cost | A little more expensive than acrylic nails. | Typically less expensive than gel nails. |
| Maintenance | Requires refilling every 2 to 3 weeks to prevent chipping. | Requires refilling every 4 weeks or as your natural nail grows. |
6 Easy Steps to Do Gel Extensions at Home
To be honest, my first try with gel nail extensions at home was not completely satisfying. I made mistakes and learnt lessons to do better every time. Finally, I am here with the 6 easiest steps for you so that you do not have to face the same struggle as me.
Here are the necessary instruments required to do gel extensions at home:
- Nail file/ buffer
- Cuticle pusher
- Cotton pads
- Rubbing alcohol
- Number 6 oval-shaped gel brush, lining brush
- UV/LED lamp
- Nail tips/ forms
- Nail glue
- Builder gel
- Polygel
- Nail polish
- Top coat
- Cuticle oil
6 Easy Step-by-Step Process for Gel Extensions
Step 1: Prepping
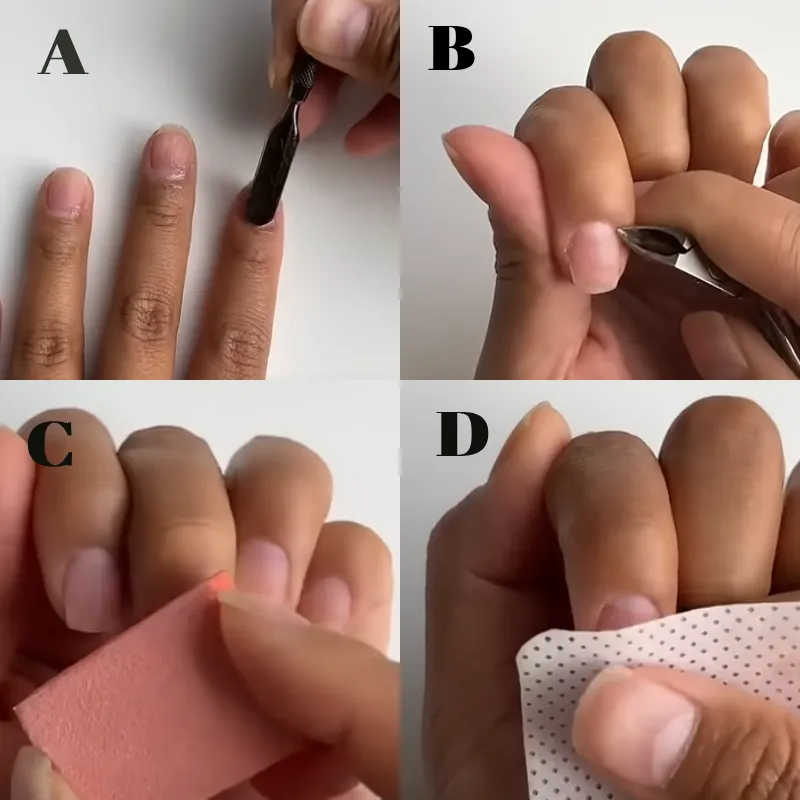
- Prepare the nails by pushing back the cuticles and cutting them carefully.
- Using a buffer or nail file, gently buff the nail bed. Remove the shine from the nails.
- Trim the nail tips. Remove any dust and wipe using an alcohol soaked cotton pad.
Step 2: Preparing the Tips
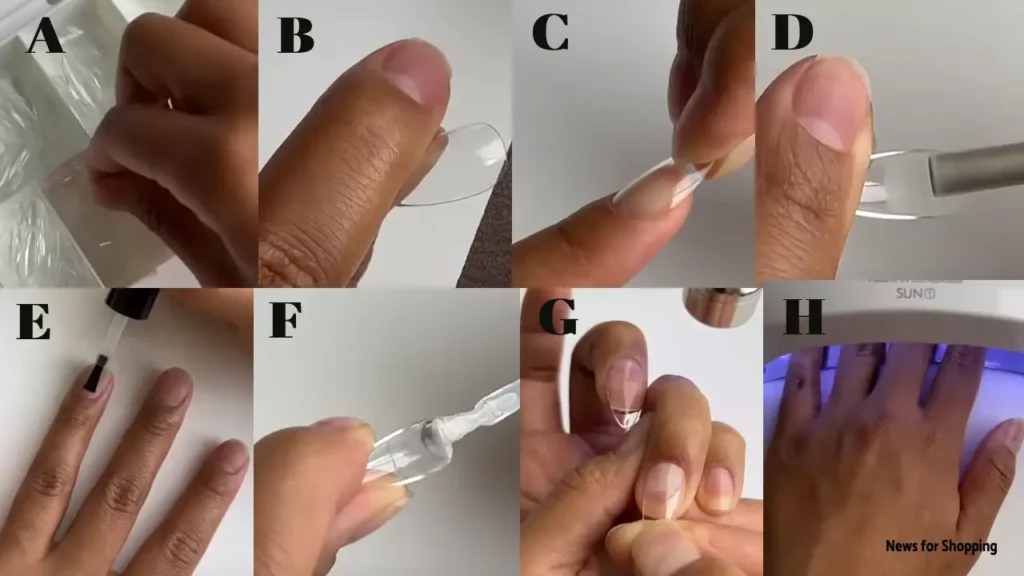
- The first thing is to choose the correct tips for each nail. Before directly sticking the tips, place them and find out if they fit with your nails or not. You can trim the edges if necessary.
- Gently file the inside of the tips to ensure a stronger grip.
- Apply a thin layer of nail glue to the tips and place it on your nails at a 40° angle.
- Once completely dried, buff the shine from the tips too. Wipe off the nails again.
Step 3: Applying Gel Extensions
- Apply a thin layer of builder gel to ensure a stronger bond between your nail base and gel extensions. Cure it under the lamp for 30 seconds.
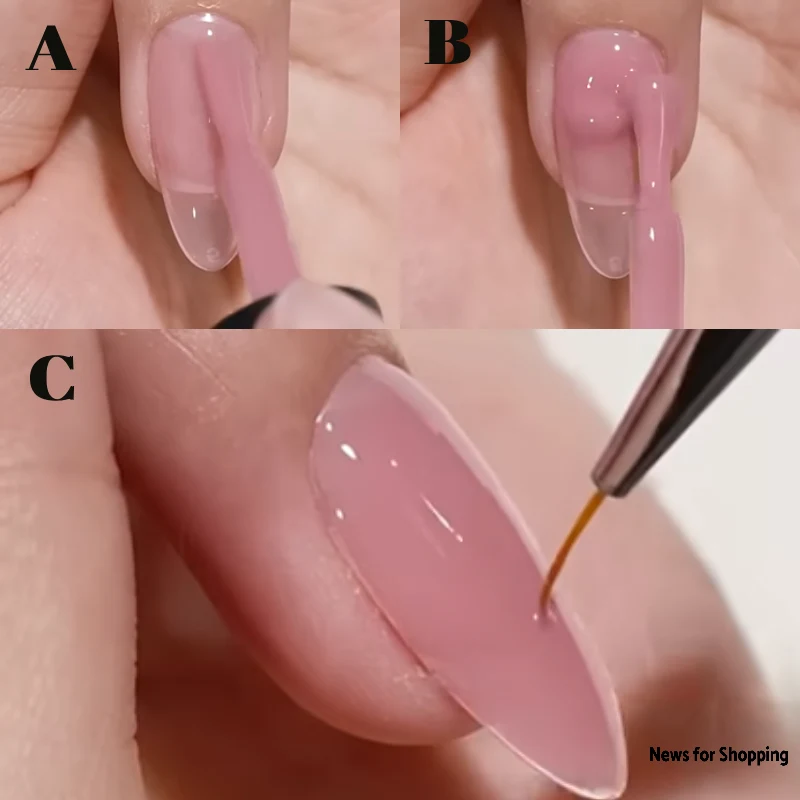
- Now, take a number 6 oval-shaped brush and polygel (any brand that works best for you). Take a little amount at a time and gently build up thin gel layers on the nails.
- Follow up the process with a thicker layer. Remember, work on one nail at a time. Start from the cuticle and carefully slide down to ensure even layers. For the sides and cuticle, I use a lining brush.
- You must run through the gel with the lining brush to even out any lumps. Also, let gravity do its work!
Step 4: Cure and Shape

- Cure the gel nail extensions under the lamp for 1 to 2 minutes. Once one nail is done, move to the next one by following the same methods.
- Take the nail buffer and gently buff the surface and sides for a straight and even look.
- Wipe off the nails using a clean alcohol-soaked cotton pad.
Step 5: Paint Nails
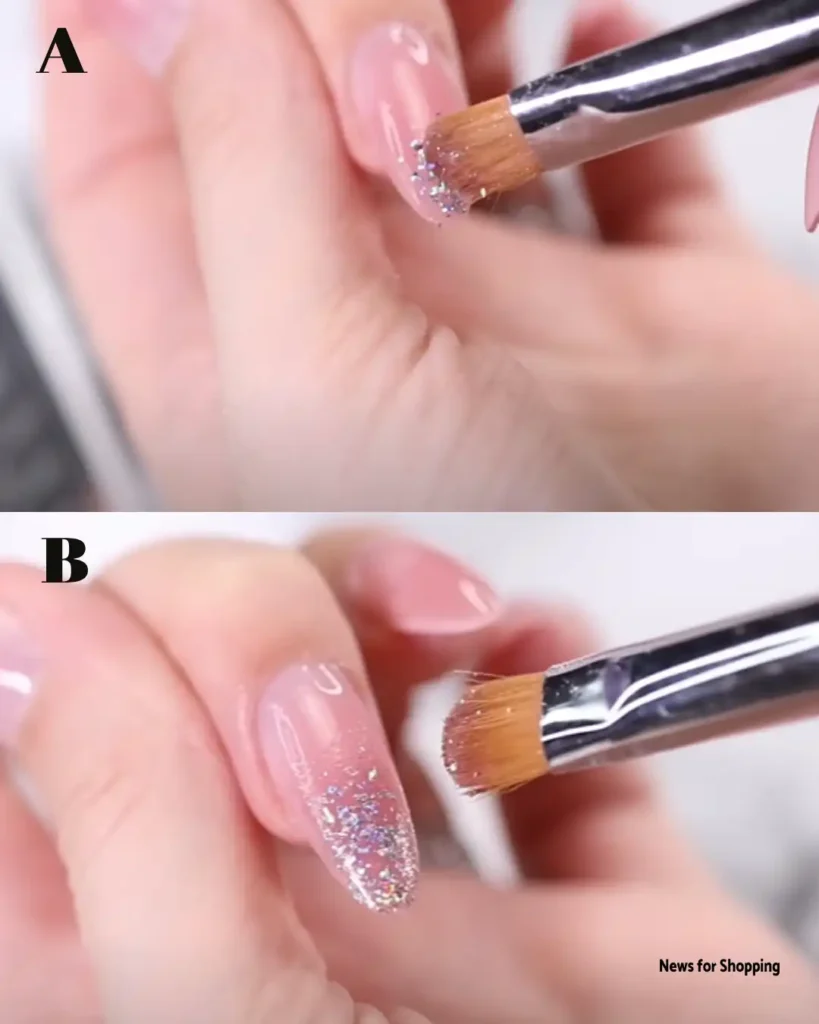
- If you are opting for a pre-colored gel extension, you can skip this part. But if you have applied clear gel, take your favourite nail polish colour and apply a thin layer on the gel polish.
- Cure under the lamp for about a minute and continue to the next nail.
- Depending on how much pigment you want, you can repeat this step 2 or 3 times.
Step 6: Finish the Mani
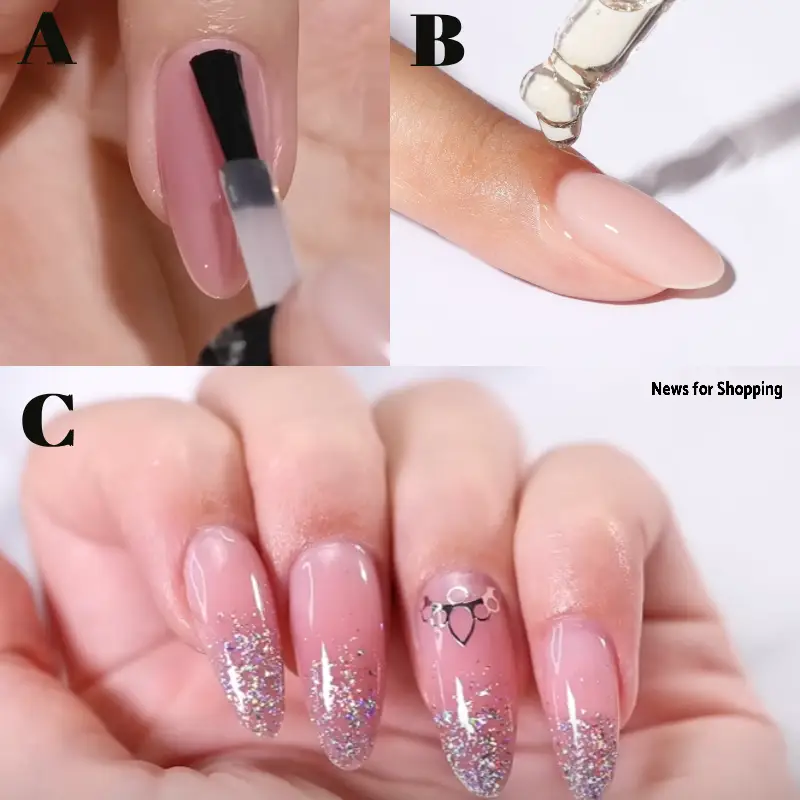
- Once the colour is set, finish it off by applying a good top coat.
- You can either choose a matte top or go for a glossy coat.
- Cure under the lamp, and your gel extensions are almost as good as a professionally done manicure.
- Do not forget to apply cuticle oil for healthy, hydrated nail growth.
Pros and Cons of Gel Nail Extensions
There are no pros without any cons. Gel extensions also have their own advantages and disadvantages that you must consider while trying at home. Here are the following:
Pros
✔ Longer, durable, and stronger nails
✔ Lightweight nail tips than other manicure techniques
✔ Safer and healthier for the natural nails
✔ Quick and easy removal process
Cons
✘ It may not work well on super short nails
✘ Weaken the natural nail base over time from long-term use
✘ Individuals might prefer to stay away from UV lights
| Note: It is true that UV rays include concerns like skin ageing and other skin issues. However, there is no proven link to skin ageing through UV/LED lamps yet. It depends on individuals’ choices. |
Aftercare Tips to Make the Nails Long-Lasting
Now that you are confident to try gel extensions at home, it is also essential to know the aftercare for a long-lasting effect. Come, follow these pro tips:
✦ To make the gel nails last longer, protect them from direct chemical interactions. You can use gloves instead while doing cleaning to avoid contact with harsh chemicals.
✦ Limit exposure to water. Especially within the first few hours of applying gel nail extensions.
✦ Be gentle with the nails. Do not use your nail as an opener or tool.
✦ Keep your nails clean, hydrated, and moisturised. Clean with gentle soap and apply cuticle oil regularly.
✦ Lastly, give the nails a break to breathe. You should take a gap between two gel extension sessions.
Can I Remove Gel Nails at Home?
Now that you know how to apply gel extensions with the super-easy steps, the last step might be how to remove gel nails. And can you even remove them at home?
The answer is yes, you can. There is a 7-step guide that you can follow to remove your gel nails easily at home without damaging your natural nails. I have explained a detailed guide on how to remove gel nail at home in a different article that you can follow.
Thank me later!
Takeaways
Excited to try gel extensions at home? The above processes clearly show that gel nail extension is much faster than other artificial nail extension techniques. So, collect the mentioned tools and equipment and start following the above steps.
Try on your own and share it with your friends if you like the tips. You can also comment below if you have any suggestions or queries regarding this process.
Frequently Asked Questions
How long do gel extensions last?
Gel nails easily last 2 to 3 weeks if taken care of properly.
What is the cost of gel nail extensions?
The cost of gel nail extensions depends on their type, how much length you want, and the design you are opting to have. It ranges between $80 to $200.
Do gel extensions damage your natural nails?
Gel nails might damage your natural nails if removed unprofessionally or due to constant long-term wear. You should take a break between each nail session for healthier nail growth.
Can teenagers do gel nail extensions?
Yes. Teenagers can get gel nail extensions, considering their nail health and growth. I advise you to only get gel extensions if you are 13+ years old.